
Craftable allows the management of both Local-level and Director-level Team Accounts and Roles from a single place!
This enables Director accounts to manage all permissions for all locations at the Director level.
Requirements
You will need a Director subscription in order to have access to the Director level. Additionally, you’ll need permissions for the various local stores that are listed under that Director umbrella in order to perform the actions listed in this article.
If you do not currently have access, but you are interested in exploring this option, please reach out to your dedicated Customer Success Manager, or if you aren’t certain who that is, send an email to support@craftable.com, and we’ll get you connected with the right individual!
To learn more about setting up Team Accounts if you don't have a Director subscription, or if you allow your stores to create roles at the store level, please see the article titled Managing Team Accounts.
Navigation
To access the Director Team Accounts page, click your name in the top, right corner, and select Team Accounts.
(Note: Only the Account Owner or those granted the "Manage Team Accounts" permission will see this option.)

On the Team Accounts page, you will have two tabs to choose from: Director and Local.

Director Team Accounts and Roles
From the Director Tab, you can add, remove, or edit Director-level Team Accounts and Director-level Roles.
To create a new Director Account, select the blue + Add Director Account button near the top right.

Enter the First Name, Last Name, Job title, and Email for the user. A Phone Number is optional.
Click the blue + Add Team Account button to confirm the change.
Note: You cannot add an email address already assigned at the store level. To enable Director access for existing local users, you will first need to delete their Local Team Account and create a Director Team Account, or contact Craftable Support to change the account type.

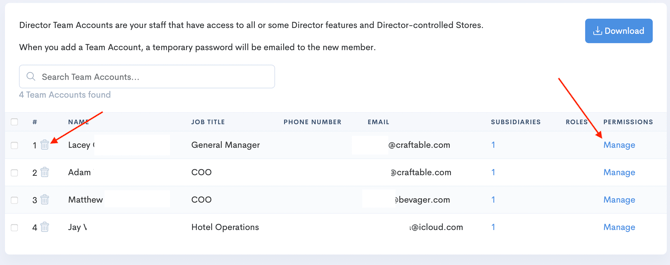
Also, you can delete any Director Team Account using the trashcan icon. A verification window will appear to ensure you’re certain about that change.
You can also edit the permissions for a Director user Team Account by selecting the blue Manage link to the right.
Director Roles
Roles allow you to create different permission sets to be applied to multiple users.
This makes it easy to manage different levels of access for everyone within your organization. Any changes that need to be made, can be made once to the role to update the relevant users all at once.
Select the Director Roles Button in the top, right corner of the page.

Click the blue + Add Role button in the top, right corner once more.

Enter the Role Name, Tag Name, and Tag Color.
Click the Add Role button to confirm the added Role.

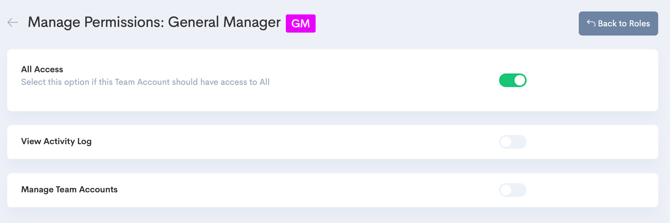
Once added, select the blue Manage link to set the permission for the Role.

This page allows you to control what specific permissions that role contains. You will toggle the various settings on or off, depending on the type of role you’re creating.
Once you have built your Director Roles, you can assign them to specific users on the Team Accounts page.
From the Director tab, select the check box to the left of the Team Account you want to update, then select the Roles button at the top right corner of the page, and lastly, click on the Role you want to assign.

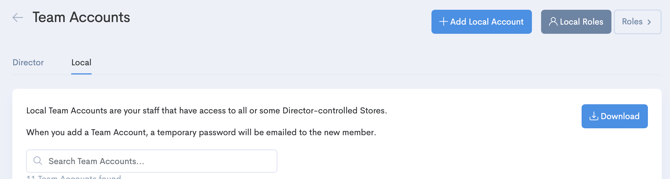
Local Team Accounts
To view all of your Team Accounts and Roles available at the store level, select the Local tab.
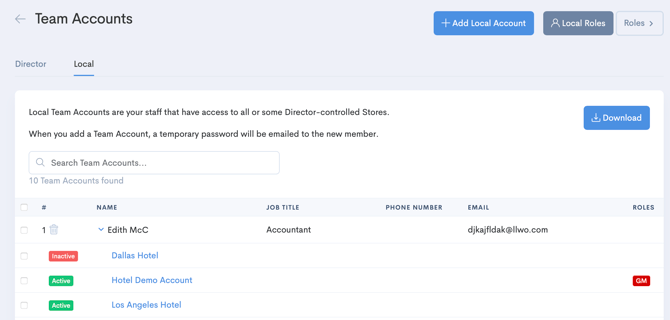
All Director accounts will be listed in addition to any local-level accounts created in total.
You can click on the arrow next to the Team Account name to check which stores they have access to.
If you want to activate or inactivate a Local Team Account for a store, just click the Active/Inactive tag to toggle it. If a user is Inactive for a store they will not be able to access that store any longer.
Just like on the Director Team Account tab, you can delete, add or edit Team Accounts and Roles that are specific to the store level. Keep in mind, Store/Local level accounts need to have at least one platform active at one store.
Store Level Roles
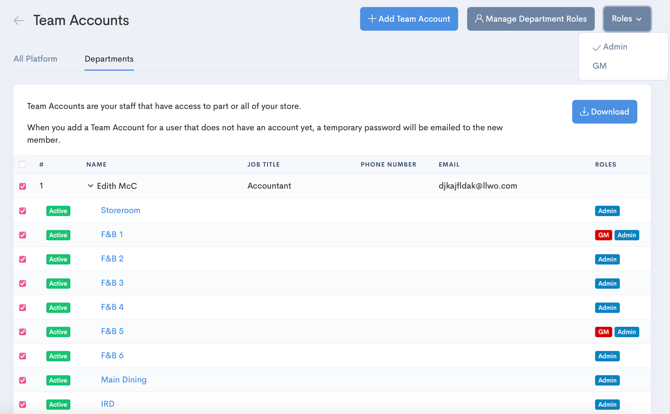
Assigning local roles can be done based on the user for all stores, or can be store-specific.
If you would like to assign a role to the user for all of their stores, simply click on the checkbox next to their name and then click “Roles” at the top right. It will display all the roles available and then select the role that you would like to assign.
To assign roles specifically to a store, click on the Arrow next to the user’s name to view all the stores. Click on the checkboxes next to the stores you would like to assign the roles for. Then click on “Roles” at the top right and select the role you would like to assign.
Role assigning can be done for multiple users and multiple stores at the same time. Just click all the checkboxes that you would like to assign or unassign. Local role assigning can also be done at the store level, but the creation and editing of the roles themselves must be done at the Director level.
Director vs Local Accounts
Users can be set up with either a Local Team Account or a Director Team Account. Users should only be given a Director Team Account if they require access to Director for one of the departments (e.g. Bevager, Foodager, Books, etc...). If a user does not require access to Director for any part of the platform then they should be set up with a Local Team Account.
As you edit users’ permissions, or if a team member’s position changes which requires a permissions update, you may need to increase their access from a Local Team Account to a Director Team Account. If this occurs, you can delete their Local Team Account and create them as a new Director Team Account, or you can reach out to the Craftable Support Team at support@craftable.com with this request in writing and they can change the account for you.