
Performing a Check Run (no authorization required)
Perform a Check Run to initiate payment to your Vendor(s). Refer to the steps below on how to perform a Check Run when no Authorization is required.
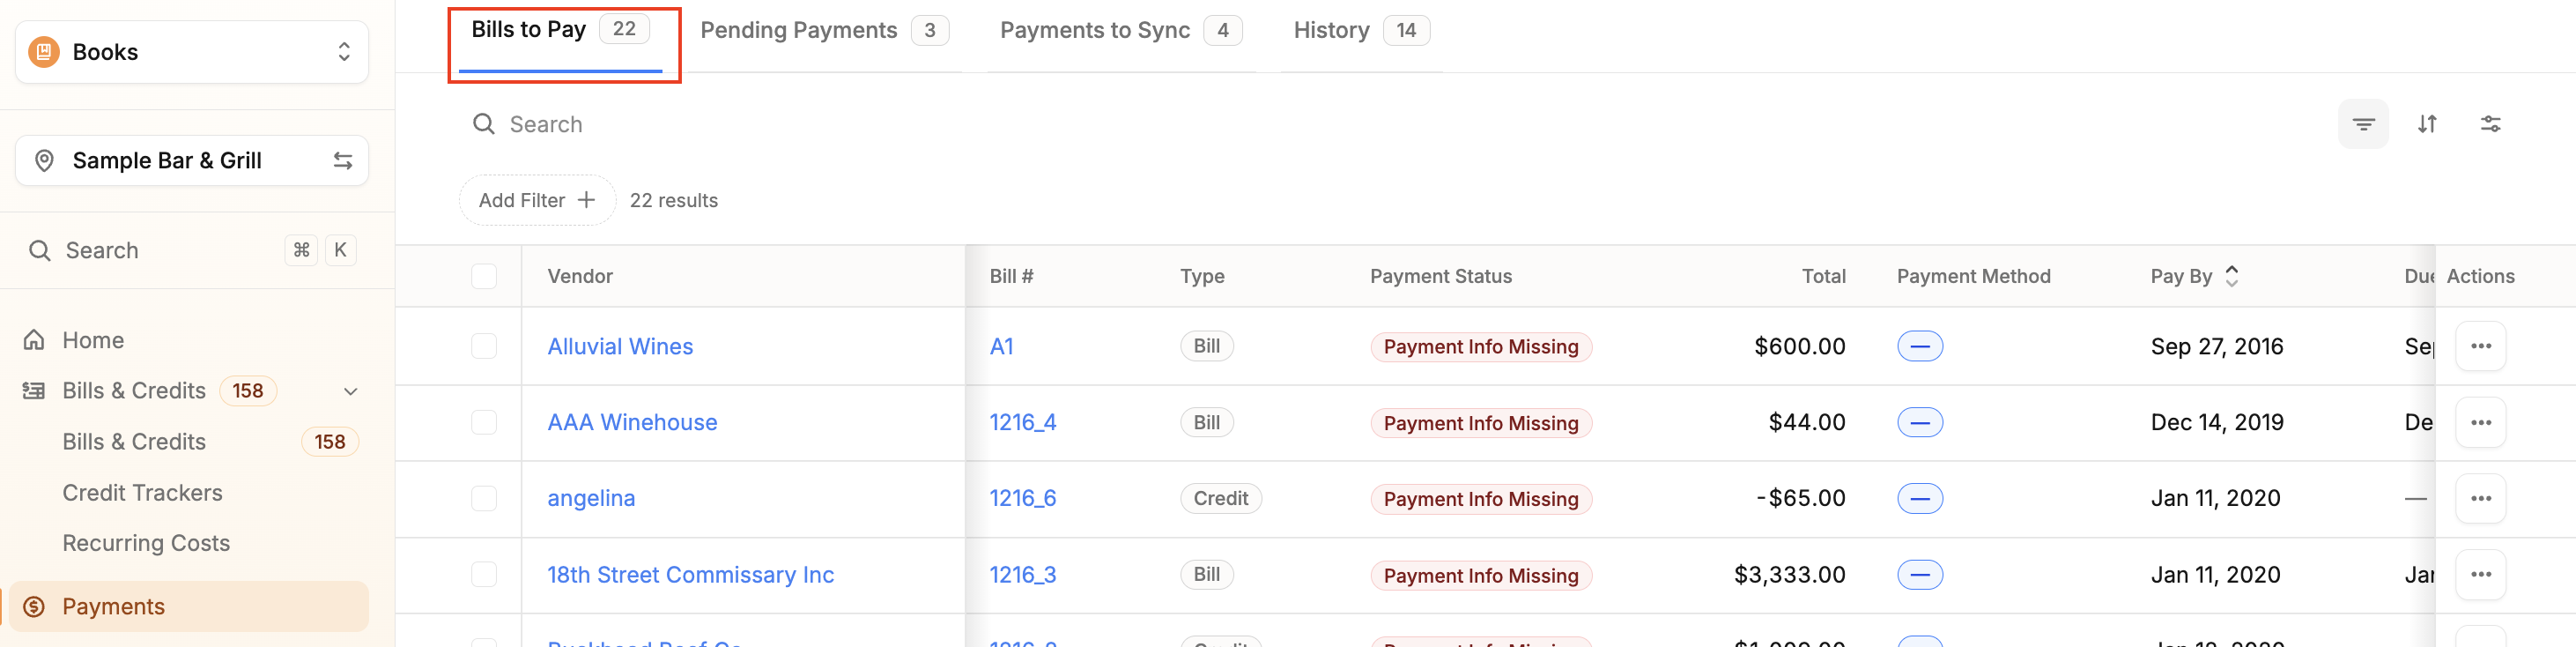
- Click on the Payments menu, and the Bills to Pay tab will load by default:
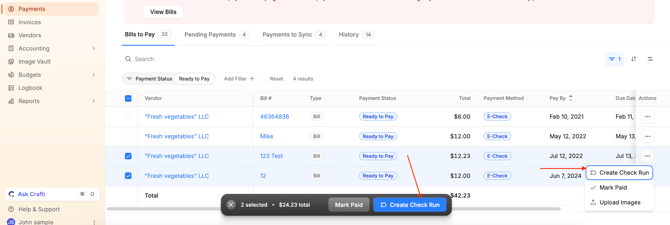
- After checking the boxes next to the applicable bills that you'd like to pay, you'll be able to Create Check Run, by clicking the three dots on the right side of the page (for one bill at a time), or, by clicking the blue button at the bottom of the page (for actioning multiple bills at once):
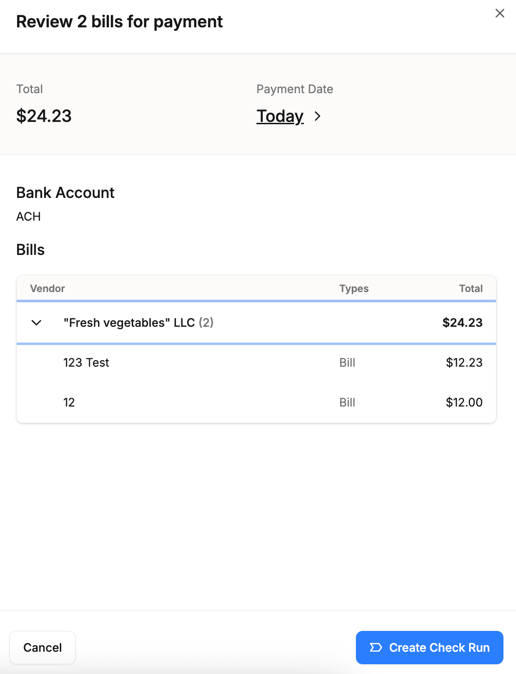
- Confirm the amount (if needed, you can click the arrow to the left of the Vendor name to view multiple bills associated with the same vendor) as well as the Payment Date (which, if you select the current date, it will say Today, as opposed to a date in the future), and then click the blue Create Check Run button.
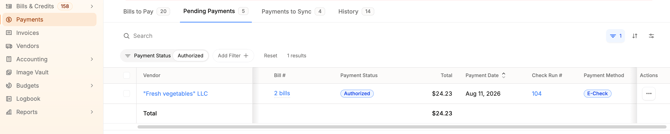
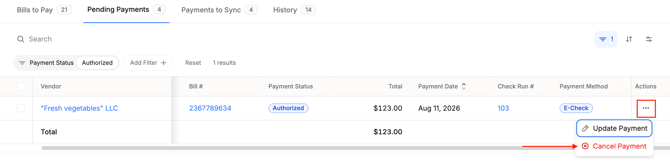
- At this point, the Bills are ready to be paid. If you navigate to the Pending Payments tab, you'll see that the Payment Status reflects Authorized. The Payment Date also indicates when the Check Run will be pulled through to the payment processor:
Some things to keep in mind
- If there are multiple authorized Bills from the same Vendor on a Check Run, they will be bundled into one payment as long as they have the same Scheduled Payment date.
- You may cancel a Payment on a Check Run while the Bill(s) maintain a status of In Check Run or Authorized without incident.
- Once the status changes to Sent, you can attempt to cancel but payment may still proceed. Confirm with your Bank that payment has been canceled, or, you can reach out to Customer Care to confirm by submitting a ticket here.