
Important Note - the ability to enforce vendor delivery schedules is only available for customers with Director-controlled vendors. Vendor Delivery Schedules, as a whole, can be set for either Director-controlled or Store-controlled vendors.
Accessing Vendor Delivery Schedules
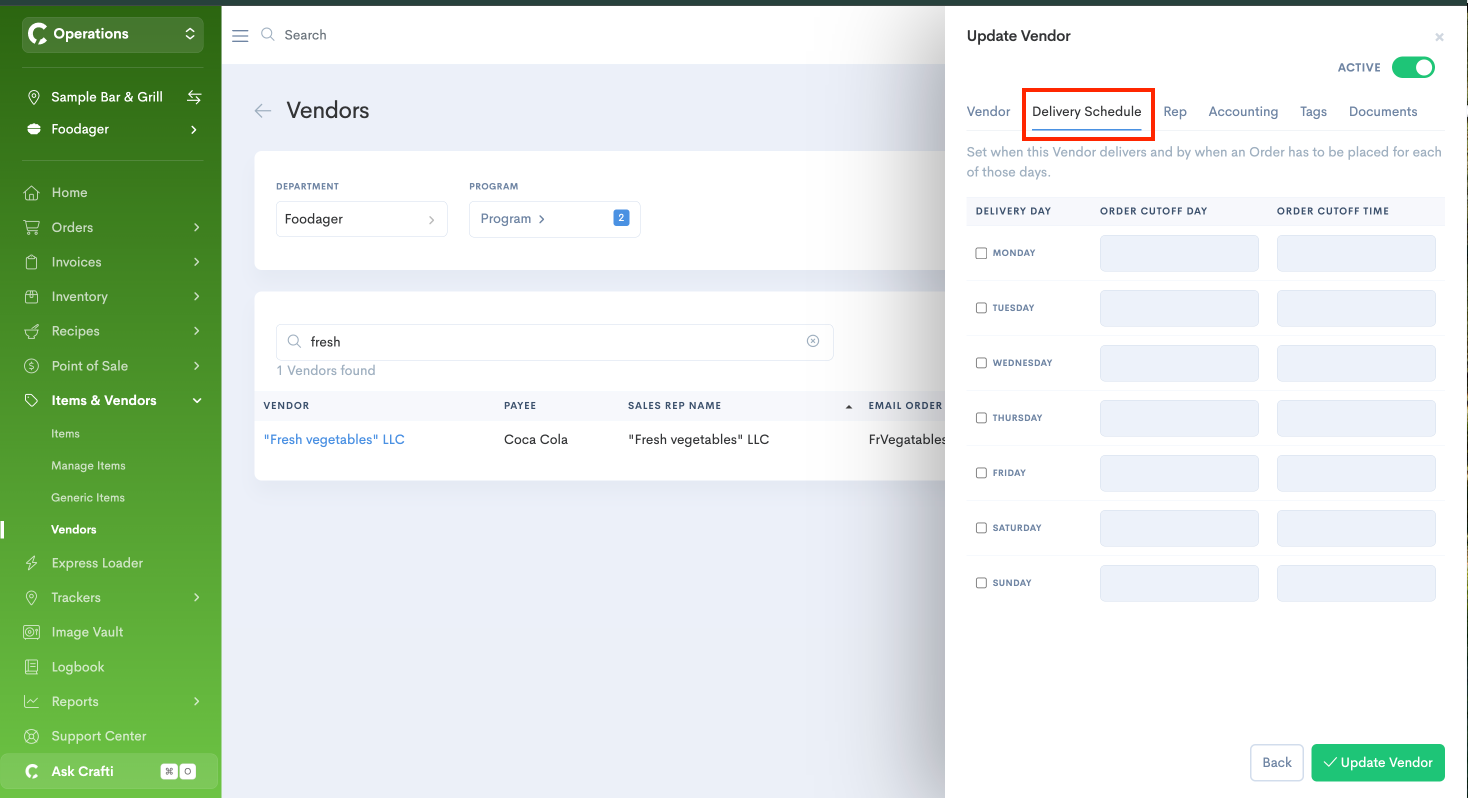
To access vendor delivery schedules, navigate to Items & Vendors > Vendors. Clicking on a vendor from the “Vendors” page will open that vendor's settings, where a new “Delivery Schedule” tab will be present.
-
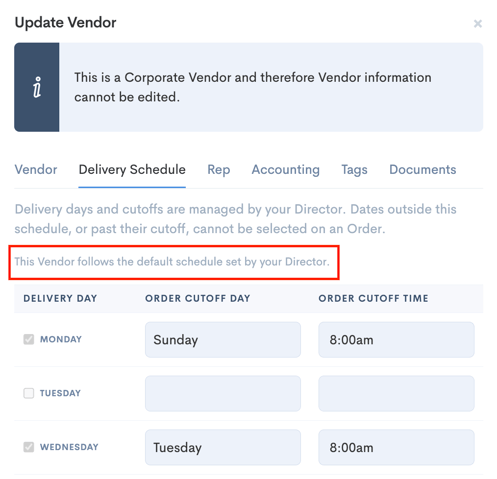
For Director-controlled vendors, this will be editable at the Director level and view-only at the store level (pictured below):
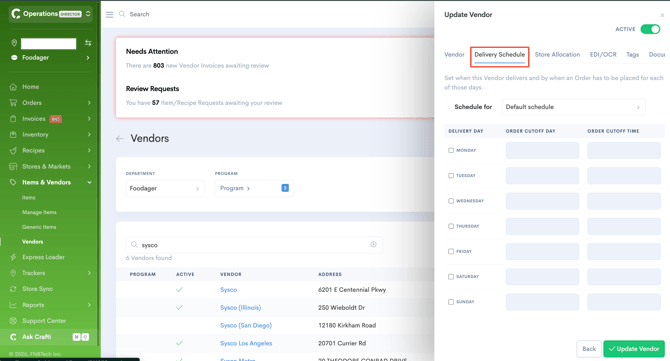
- For Store-controlled vendors, this will be editable at the Store level.
Setting Vendor Delivery Schedules (Bulk) - Director Only
If this is the first time you have navigated to the Delivery Schedule tab for a particular vendor, the schedule will be blank on initial landing and will remain this way until some input is made. A blank schedule indicates that our system is uninformed of any particular delivery schedule for that vendor.
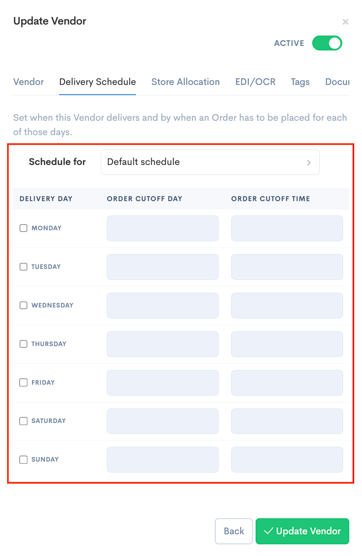
In the Schedule for field, using Default schedule allows a schedule to be applied in bulk across stores allocated to that vendor.
Upon inputting a schedule and selecting the green Update Vendor button, this schedule will then be applied to any stores allocated to this vendor and which do not have a custom schedule already set for this vendor.
However, any store which has been allocated to this vendor can be given its own unique delivery schedule. We will further detail out how to do this later in this article.
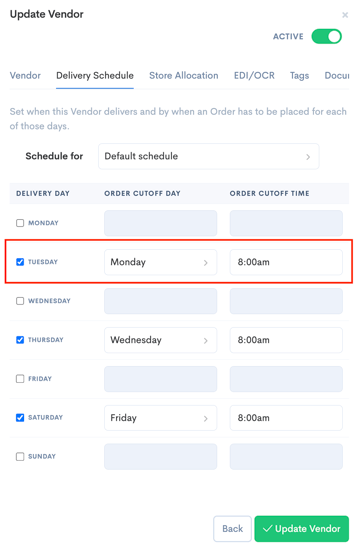
In order to set a Delivery Schedule, check the box next to any day of the week that applies for the Delivery Day. This indicates days where you can expect the vendor to make their deliveries.
Once you check a Delivery Day box, the Order Cutoff Day and Order Cutoff Time fields become editable. It will always default to the day prior at 8:00am, but these fields can be changed by clicking into those boxes and selecting another day and/or time.
When you are done with your changes, click the Update Vendor button to put the new default schedule into effect.
Setting Vendor Delivery Schedules (Unique to Store) - Director Only
There may be times you need to select a Delivery Schedule that is custom to a store, or a set of stores based on their region. If you have saved a Default Schedule, until you set up the customized schedule, all locations will use the Default Schedule applied.
To change from the Default Schedule, click into that box, and you'll be presented with the list of stores that are allocated to that vendor. Click into the store of which you'd like to set a custom schedule:
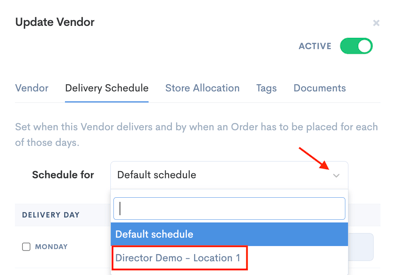
After doing so, if you have set a Default Schedule, that will appear at first (or it will be blank if there isn't a default schedule set), and you can make any needed updates and save the schedule by clicking the green Update Vendor button. There is also the option at the bottom to Reset to default schedule, if needed.
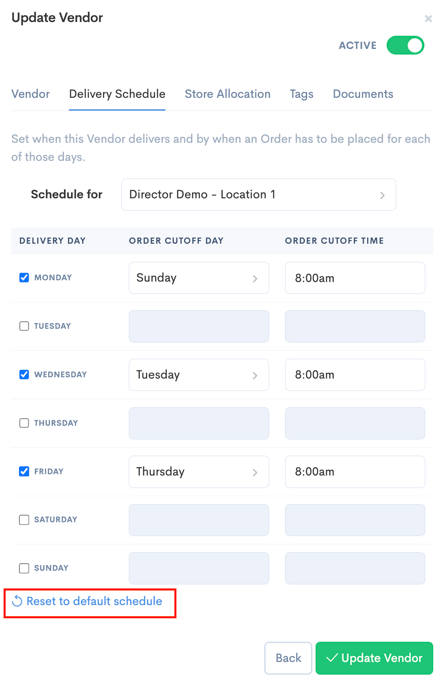
Note: Once you set a custom schedule for a location, if you make any subsequent changes to the vendor's "Default Schedule," that will not update or impact the custom schedule in any way.
As a reminder, stores will have the capability to view their delivery schedules, but the fields will not be editable, and they will see a message that This Vendor follows the default schedule set by your Director.
Setting Vendor Delivery Schedules (Store-Controlled Vendors)
If you do not utilize Director-level vendors, you can still set Delivery Schedule dates and cutoff times for your store, but at this time, you won't be able to enforce the order delivery date that's mentioned later in this article.
To set a Delivery Schedule for a store-controlled vendor, you follow the same steps as above:
- Navigate to Items & Vendors > Vendors.
- Locate the vendor in question, click on it, and this will open the vendor's settings. Click on the Delivery Schedule tab.
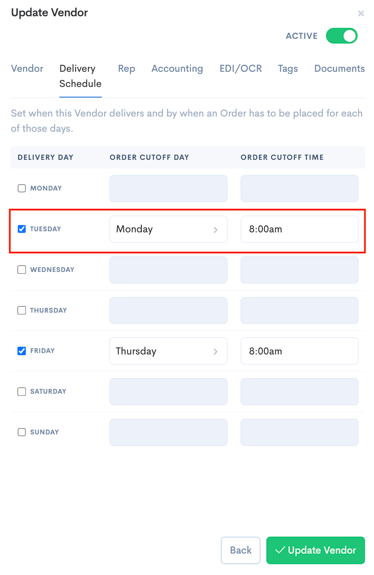
In order to set a Delivery Schedule, check the box next to any day of the week that applies for the Delivery Day. This indicates days where you can expect the vendor to make their deliveries.
Once you check a Delivery Day box, the Order Cutoff Day and Order Cutoff Time fields become editable. It will always default to the day prior at 8:00am, but these fields can be changed by clicking into those boxes and selecting another day and/or time.
When you are done with your changes, click the Update Vendor button to put the new default schedule into effect.
Viewing Vendor Delivery Schedule Details on Order Form
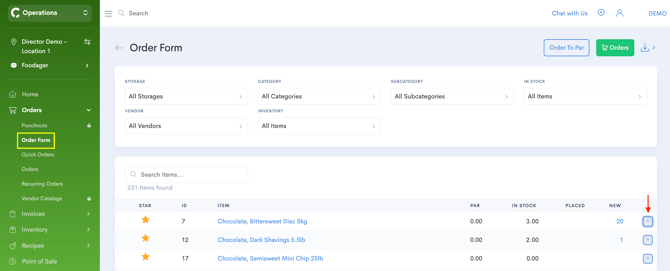
Once a delivery schedule is put in place, details about it will be visible when you go to add items in the Order Form. From the Orders menu, click on Order Form, and then click on the plus sign next to items you intend to add to the order:
This will bring up a box that looks similar to the following:
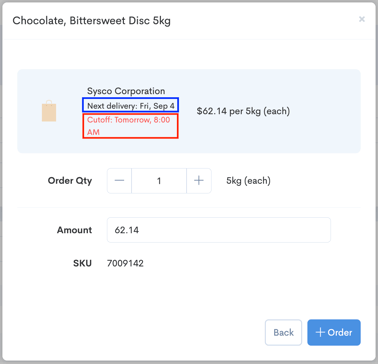
You will see the next upcoming delivery date for the vendor as you attempt to add items to an order (outlined in blue).
As well, if the cut-off time is within the next 24 hours, that will be displayed beneath the next available delivery date to inform how much time is left to order from the vendor in order to meet that delivery date (outlined in red).
If a delivery schedule has not been set for a vendor for that store, then no text indicating either of those things will be present.
Enforcing a Vendor Delivery Schedule (Director-controlled vendors only)
To enforce the vendor delivery schedule, another step must be taken. All of the steps above put the schedule into place and will do a great job of informing the stores of important dates and times. However, if you wish to enforce the delivery schedule, meaning your operators will be restricted to having to set a delivery date to place an order, then please follow the steps below.
Navigate to the store location and access the All Departments View. Click on your name in the top, right corner:

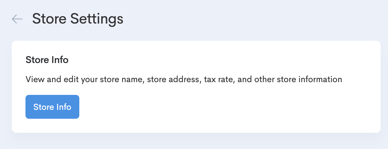
Click the blue Store Info button.
 Scroll down about halfway down the page until you locate the setting called Require Order Delivery Date. Toggle on to enable this restriction, or toggle off to disable. To finalize, click the green Update Store Info button.
Once you have enabled the setting to enforce the vendor delivery schedule, upon attempting to click the Place Order button, users will be prompted with an error, asking them to enter a Delivery Date.
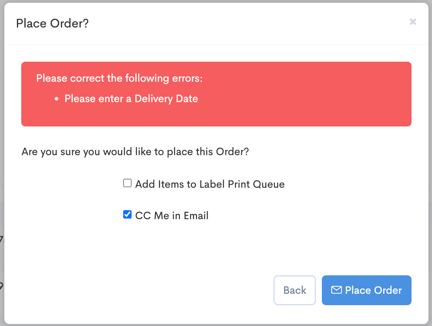
In order to select a Delivery Date, you need to click the pencil icon next to the Order, and then in the Update Order modal, you'll click into the Delivery Date field, which brings up a calendar. Users will only be able to select dates which are:
- In the future
- Not already beyond their assigned cutoff time
Select an available delivery date and then finalize by clicking the blue Update Order button.
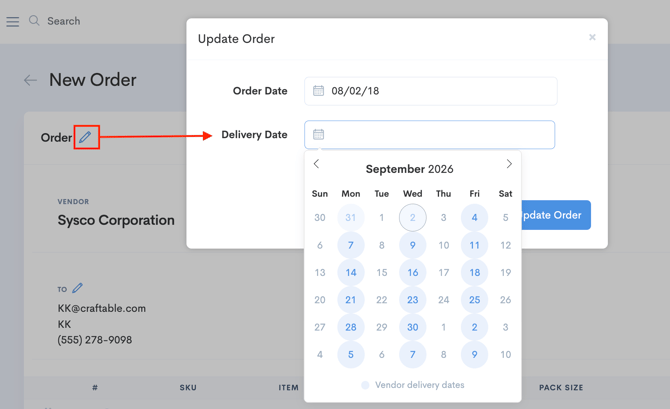
With a valid delivery date now applied to the order, the Place Order button will continue with no errors.
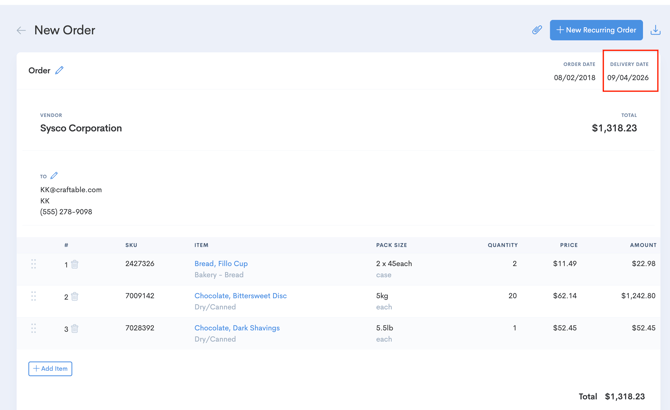
Note: If a vendor delivery schedule for a store is empty / null, then any future date will be available for selection, and you'll be able to view it from this screen.