
Please note: To have this functionality activated for your account please contact Craftable Support on support@craftable.com
Portion Example:
Raw item: Tuna Whole ➡️ Portioned Item: Tuna Sashimi
In this example, a restaurant would purchase Tuna Whole (raw item) and cut it, creating Tuna Sashimi (portioned item)!
Since Tuna Sashimi is what’s actually sold, it still needs to be tracked. However, because the store does not purchase Tuna Sashimi, the store would purchase and track Tuna Whole (the raw item) as well. Both items need to be tracked!
Setup
- Item you will be portioning - Make sure this item (the one purchased from a vendor) exists in Craftable. If it doesn’t exist yet, create a New Item first.
- Portioned item - At the Director level, set the Item Type to Portioned. Again, these are the items you create from the raw item you purchase from your vendor.
Note: You can inventory Portioned items, but you cannot purchase them from vendors. They will not have a Purchases tab.
- Perform a Store Sync.

- From each store, go to Inventory > Portions > +New Portion.

- In the Item field, select the raw item you purchase from your vendor.
- Then, choose the Portioned Items that can be made from it.
- Click Save.
Entering Portions
- To enter an instance of Portioning, click the plus (+) sign at the right of the item.

- In the popup fill out all requested fields:
- Portion Date: The data the portioning took place - this impacts your theoretical inventory
- Employee: Which staff member did the portioning? You can type in any name or select a name from the dropdown of anyone who has previously been entered as a portioning employee.
- Starting Weight: What did the item weigh initially, before portioning? This is how much total will be subtracted from the theoretical inventory of the item.
- Trimmed Weight: What is the total weight of the item once all trimmings that are thrown away are removed?
- Actual Qty: Here just click on the “0.00” to enter the total weight of each portioned item. You should enter the quantity in the count unit of each portioned item. (So if the row is by the ounce enter how many ounces you portioned, if it’s by pound enter the pounds, etc…) The system will sum this up to give you a total portioned weight.
Example:
Tuna is purchased by the whole fish, and then portioned into Tuna Sashimi.
Setup
Step 1: Ensure the item you buy from your vendor exists first as an Inventory Item:

Step 2: Create Portioned Items
 |
Step 3: Do a Store Sync - in the navigation bar at the left click Store Sync > Sync Stores.
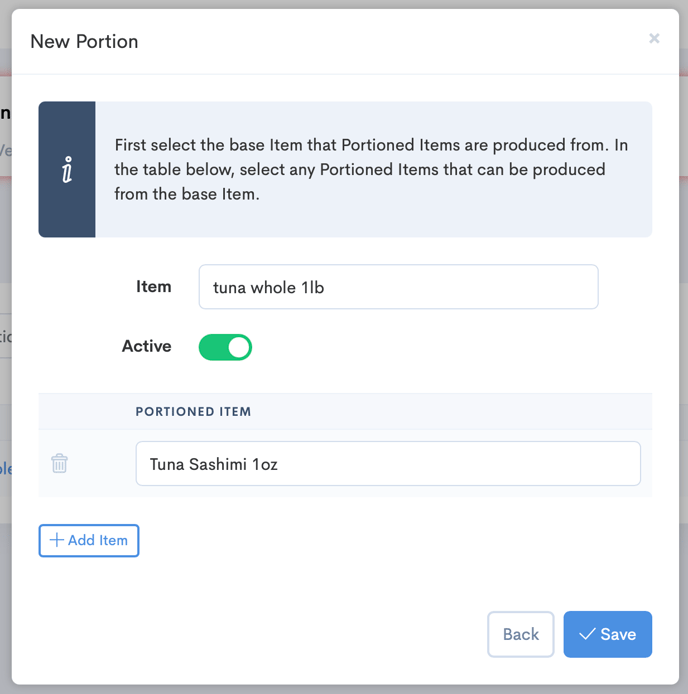
Step 4: Within each store go to Inventory > Portions > + New Portion and set up the portion. The item you purchase from your vendor goes at the top, and the portioned items are selected within the table below.
Entering Portions
- Click the plus sign to the right of the item on the Portions page (under Inventory header).

- Enter details of the portioning event and click Save.

Portion History
From the Portions tab you will notice that there is an option to look at History, as shown in the screenshot below:  By selecting History, you can get insights of when the portioning occurred, the name of the portion, the employee who portioned that day, Quality %, Trimmed Yield %, and Final Yield %.
You can click on the little question mark with a bubble next to Portion History to see how we calculate the percentage fields listed above. 
FAQ
How does this impact pricing?
The price of a portioned item updates each time you portion the raw item. If the raw item's price increases today but you don’t portion it again until next week, the portioned items will keep their previous inventory value. Once you run portioning again, the new portions will reflect the updated Count Unit Price of the raw item.